When cravings call for something both refreshing and indulgent, the Raspberry Swirl Coconut Snowball Cake Recipe is always my go-to. It’s a fluffy, delightfully moist cake featuring a delicate coconut base with bursts of bright raspberry swirls that feel like little snowballs bursting with flavor. Perfect for celebrations or whenever you want a special cake that’s not too heavy yet deeply satisfying.
Jump to:
In the Kitchen
I love this Raspberry Swirl Coconut Snowball Cake Recipe because it brings together the subtle sweetness of coconut with the vibrant tartness of raspberry in a loaf that looks as beautiful as it tastes. It’s the kind of cake that brightens any afternoon tea or stands out on a brunch table.
- Juicy and Tender Every Time: The coconut milk and sour cream keep the cake irresistibly moist and tender.
- Golden, Satisfying Finish: A light dusting of toasted shredded coconut on top adds a toasty crunch that’s hard to resist.
- Simple Ingredients, Big Impact: You’ll only need pantry staples and fresh raspberries to create deep, natural flavor swirls.
- Weeknight to Weekend Ready: It’s easy enough for a weeknight treat but elegant for weekend gatherings.
Ingredients at a Glance
To nail the texture and flavor of this Raspberry Swirl Coconut Snowball Cake Recipe, focus on fresh raspberries and quality coconut milk. That balance really makes a difference in every bite.
- Fresh Raspberries: Look for plump, firm berries for vibrant color and flavor that won’t turn mushy.
- Coconut Milk (full fat): Choose canned coconut milk for creaminess — it’s key for that tender crumb and subtle coconut flavor.
- Shredded Coconut (unsweetened): Use unsweetened for toasting on top — it adds texture without extra sugar.
- All-Purpose Flour: Gives structure while keeping the cake light and fluffy.
- Sour Cream: Adds moisture and a gentle tang that balances the sweetness.
- Baking Powder & Baking Soda: Your combo for a nicely risen, airy cake.
Heads-Up: Exact measurements are in the printable recipe card at the bottom.
How to Make Raspberry Swirl Coconut Snowball Cake Recipe
Step 1 — Prepare the Coconut Cake Batter
Start by preheating your oven and greasing a loaf pan. In a mixing bowl, whisk together the dry ingredients — flour, baking powder, baking soda, and a pinch of salt. In a separate bowl, beat the eggs, then add sugar, coconut milk, and sour cream until smooth and creamy. Slowly fold the dry ingredients into the wet until just combined. You want a smooth batter, but don’t overmix — that keeps the crumb tender and light.
Step 2 — Swirl in the Raspberry Puree
Gently mash fresh raspberries to create a puree, leaving some small chunks for texture. Dollop spoonfuls of this puree throughout the cake batter in the pan. Then, take a butter knife or skewer and swirl gently — you don’t want to fully mix it in. These beautiful raspberry veins turn the cake into a visual and flavor treasure with every bite.
Step 3 — Bake and Toast the Coconut Topping
Bake the cake in the oven until a toothpick inserted in the center comes out clean, usually around 50-60 minutes. While it’s baking, lightly toast shredded coconut in a skillet over medium heat until just golden and fragrant — this step adds a nutty contrast that complements the soft cake perfectly. Once the cake is out and slightly cooled, sprinkle the toasted coconut on top for that signature snowball look and crunch.
Things to Remember
This Raspberry Swirl Coconut Snowball Cake Recipe rewards gentle handling and close attention to the texture. To get fluffy folds of raspberry and keep the cake moist, avoid heavy stirring and focus on quality ingredients.
- Doneness Cue: Look for a golden crust and test with a toothpick — it should come out clean or with just a few moist crumbs.
- Temperature Trick: Use room temperature eggs and coconut milk for better emulsification and more rise.
- Make-Ahead Move: This cake tastes even better the next day after resting wrapped tightly in the fridge.
- Common Pitfall: Avoid swirling too aggressively or the raspberries will lose their lovely pattern and the batter might get tough.
Ways to Serve It
Finishing Touches
A dusting of powdered sugar or a drizzle of coconut cream makes this cake feel extra special. I love how the light swirl of raspberry punctuates the tropical coconut flavors — it’s simple yet elegant. Fresh raspberries alongside add a lively, juicy pop.
Plays Well With
This cake pairs beautifully with a cup of black tea or a mild coffee. For a dessert plate, try a scoop of vanilla ice cream or whipped cream to balance the tang of the raspberries. Toasted nuts add crunch for a nice textural contrast.
Simple Plating Upgrades
Serve slices on colorful plates to highlight the raspberry swirls. You can also sprinkle a little toasted coconut around the plate or add a mint leaf for a fresh visual pop on special occasions. Even a simple wooden board feels cozy and inviting for casual sharing.
Make-Ahead & Keeping Fresh
Storing Leftovers
Keep leftovers tightly wrapped or in an airtight container in the fridge. The cake stays moist and flavorful for 3-4 days, though it usually disappears before then. If your kitchen is humid, an airtight container prevents the toasted coconut from absorbing moisture and losing crunch.
Freezing Tips
Yes, you can freeze this cake! Wrap it tightly in plastic and foil to protect from freezer burn. Thaw overnight in the fridge and bring to room temperature before serving. The texture is slightly softer after freezing but still delicious — great for prepping treats in advance.
Reheating Raspberry Swirl Coconut Snowball Cake Recipe Without Drying Out
Warm slices gently in the microwave at 50% power for 15-20 seconds, checking often to avoid drying. You can also heat in a low oven (about 300°F/150°C) wrapped loosely with foil to keep moisture in. A quick zap of coconut cream or a sliver of butter melting on top after reheating brings back that luscious mouthfeel.
Frequently Asked Questions
Absolutely! Just thaw and drain excess juice before swirling them into the batter to avoid thinning it out too much.
Not as written, since it uses all-purpose flour. However, you can experiment with gluten-free blends that measure cup-for-cup for baking.
Yes! Blueberries or chopped cherries work well and offer a similar juicy burst and color contrast.
Dollop and swirl gently instead of mixing throughout the batter. Also, avoid too thin a puree — too much liquid can cause sinking.
Final Thoughts
This Raspberry Swirl Coconut Snowball Cake Recipe is one of those wonderful desserts that feels special but is totally doable. It’s a celebration of texture and flavor — soft coconut, tart raspberry, and a little toasty crunch — that just hits all the right notes. Give it a try for your next get-together or anytime you want to brighten the day with cake that’s as joyful as it is delicious.
PrintFull Printable Recipe

Raspberry Swirl Coconut Snowball Cake Recipe
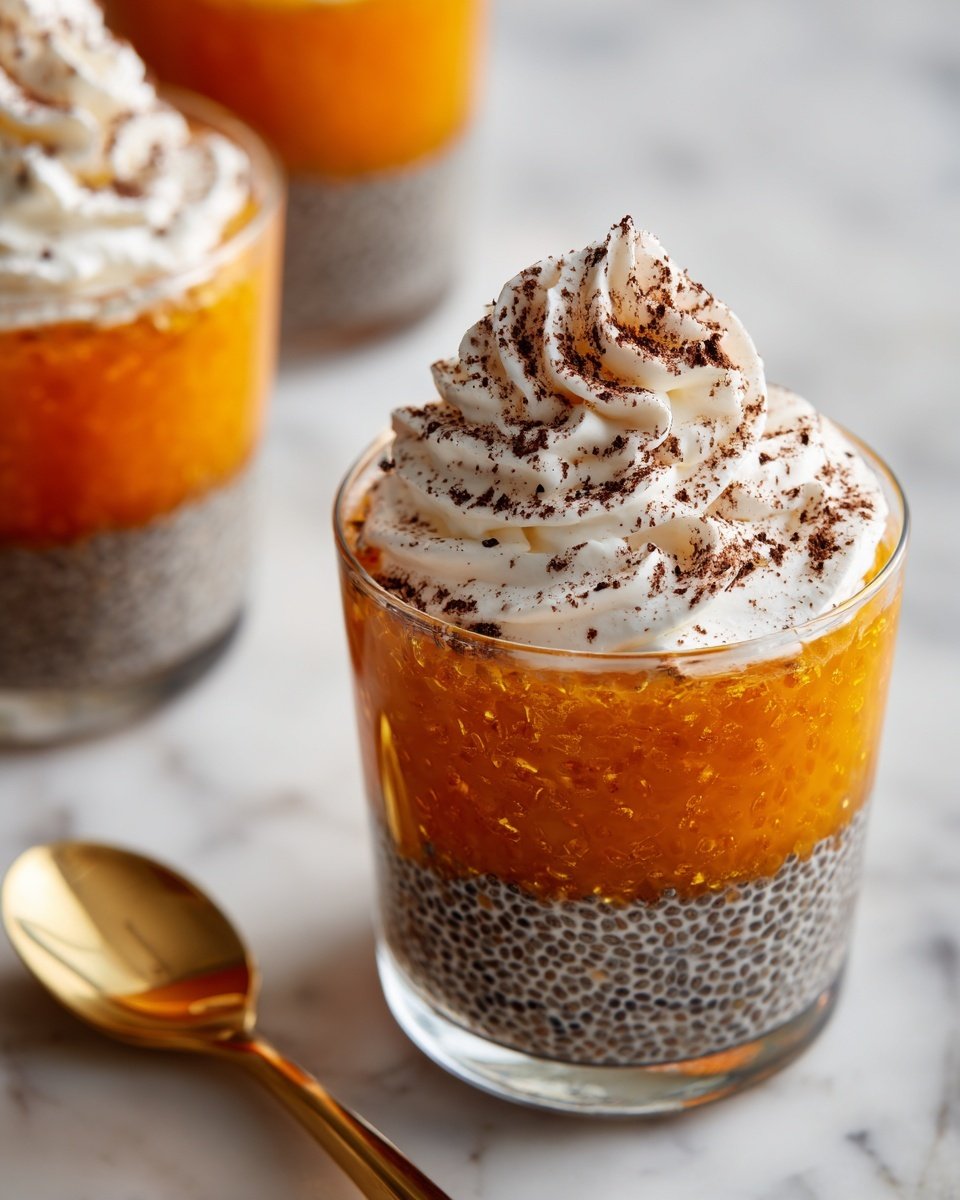
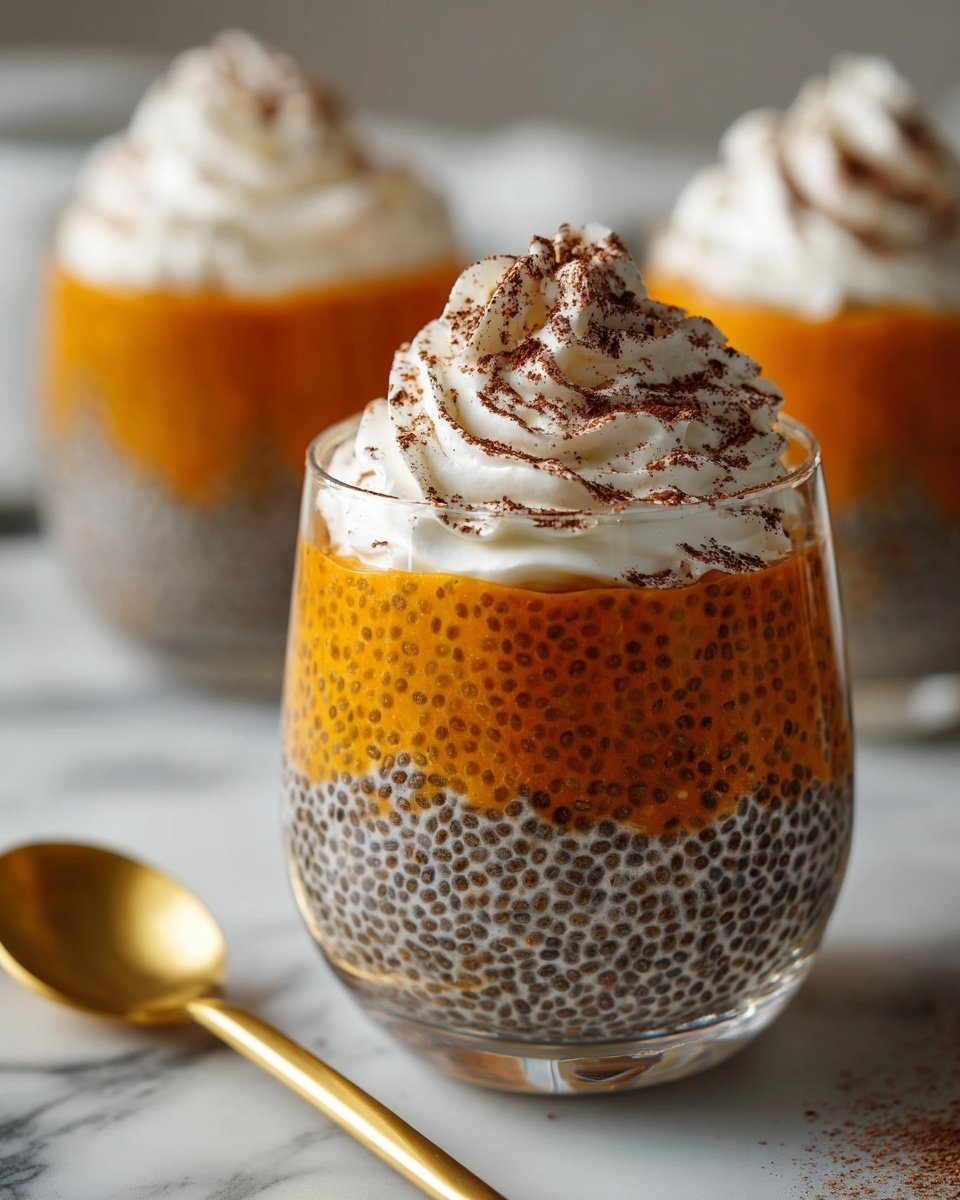
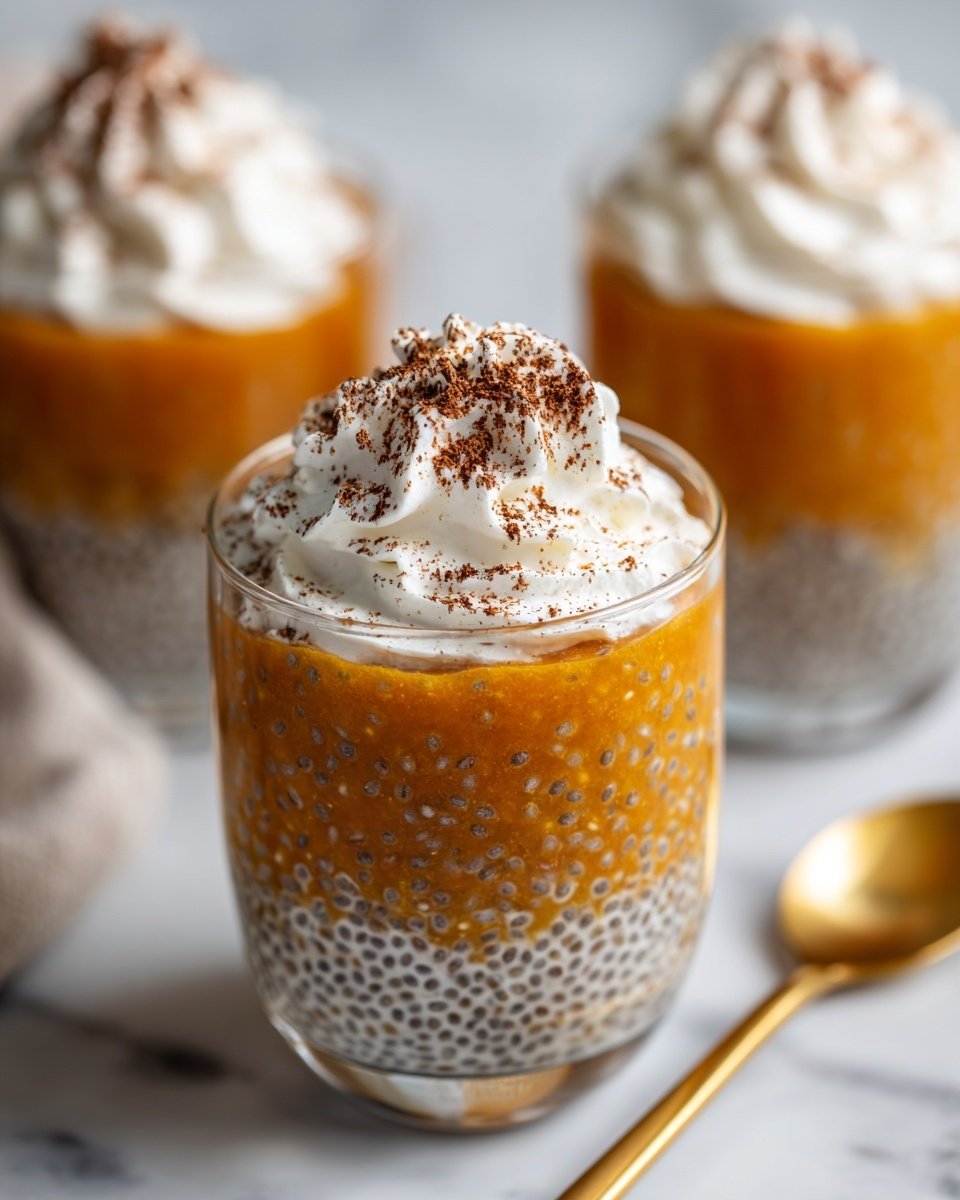
This easy pumpkin chia seed pudding is a nutritious and delicious wellness treat perfect for autumn. Combining creamy milk, vitamin-rich pumpkin puree, warming pumpkin pie spice, and fiber-packed chia seeds, this no-cook pudding comes together in just 10 minutes with a creamy, smooth texture after chilling. Naturally sweetened with maple syrup and customizable with dairy-free milk options, this pudding supports healthy digestion and keeps you full for hours.
- Total Time: 4 hours 10 minutes
- Yield: 2 servings
Ingredients
Main Ingredients
- 1 cup milk of choice (oat milk, coconut milk, or almond milk)
- ½ cup pumpkin puree
- 1-2 tablespoons maple syrup
- 1 teaspoon pumpkin pie spice
- ⅛ teaspoon salt
- ¼ cup chia seeds
Instructions
- Create Your Flavor Base: In a medium bowl, whisk together 1 cup of milk, ½ cup pumpkin puree, 1 teaspoon pumpkin pie spice, ⅛ teaspoon salt, and 1-2 tablespoons maple syrup until the mixture is completely smooth and free of lumps. Use a fork or small whisk to break up any pumpkin clumps for a silky consistency.
- Incorporate the Chia Magic: Add ¼ cup chia seeds to the pumpkin mixture and stir vigorously for about 30 seconds to prevent clumping and ensure even absorption of the liquid.
- The Anti-Clump Insurance: Let the mixture sit for 5 minutes, then stir vigorously again to break up any forming clumps and achieve perfect seed distribution.
- The Transformation Phase: Cover the bowl and refrigerate for at least 4 hours or overnight. During this time, chia seeds absorb the liquid and form a creamy, gel-like pudding consistency.
- Final Touches: Before serving, give the pudding one final stir and taste it. Adjust the sweetness if desired by adding more maple syrup. The pudding should be creamy, thick, and spoonable.
Notes
- Use coconut milk for a richer and creamier pudding texture.
- Substitute maple syrup with honey, agave, stevia, or 2-3 pitted dates blended into the mixture for natural sweetness.
- If you prefer a smoother pumpkin flavor, use pumpkin pie spice blend instead of separate spices.
- For best texture, do not skip the second stirring step after 5 minutes.
- The pudding can be stored covered in the refrigerator for up to 3 days.
- Prep Time: 10 minutes
- Cook Time: 0 minutes
- Category: Dessert
- Method: No-Cook
- Cuisine: American
- Diet: Vegetarian


Leave a Reply