If you’re looking for a cozy, wholesome treat that feels like fall in a bowl, this Easy Pumpkin Chia Seed Pudding Recipe might just become your new favorite. It’s perfect for breakfast, a snack, or even a light dessert when you want something healthy but indulgent. I love how it comes together quickly with pantry-friendly ingredients and leaves you with a creamy, spiced pudding that’s naturally sweet and packed with fiber and omega-3s.

Jump to:
In the Kitchen
This Easy Pumpkin Chia Seed Pudding Recipe is a lifesaver for busy mornings or when you want a nutrient-packed treat without fuss. I find it incredibly satisfying because the chia seeds give it a luscious, pudding-like texture while the pumpkin purée adds moisture, subtle sweetness, and that cozy fall vibe we all crave. Plus, it’s customizable—you can adjust spices or sweetness easily to match your taste.
- Juicy and Tender Every Time: The pumpkin helps hydrate the chia seeds perfectly, preventing any dryness.
- Golden, Satisfying Finish: The natural spices like cinnamon and nutmeg bring warmth and depth to this simple dessert.
- Simple Ingredients, Big Impact: Using just a few staple pantry items, you create a dish that feels indulgent but is wholesome.
- Weeknight to Weekend Ready: It’s ready in minutes but benefits from chilling overnight, making prep effortless.
Ingredients at a Glance
Choosing quality ingredients here really pays off. Because the recipe is so simple, each component shines through—whether that’s your choice of milk or the pumpkin purée. I always recommend organic pumpkin for the best flavor and a non-dairy milk you enjoy, so the pudding’s creaminess feels just right.
- Pumpkin Purée: Opt for 100% pure pumpkin — not pumpkin pie filling — for authentic flavor and texture.
- Chia Seeds: Use fresh, whole chia seeds for the best gel-like texture; store them in a cool, dry place.
- Milk of Choice: Almond, oat, or regular dairy milk work wonderfully; avoid anything too watery.
- Sweetener: Maple syrup or honey adds natural sweetness without overpowering the pumpkin’s subtle earthiness.
- Warm Spices: Cinnamon, nutmeg, and a pinch of cloves elevate every spoonful with cozy fall notes.
Heads-Up: Exact measurements are in the printable recipe card at the bottom.
How to Make Easy Pumpkin Chia Seed Pudding Recipe
Step 1 — Mix the Pumpkin and Milk Base
Start by combining your pumpkin purée with your milk of choice in a medium bowl. I find whisking these together first creates a silky, even base for the chia seeds to absorb later. This step is quick but important—if you don’t mix well here, you might end up with clumps of pumpkin or uneven texture.
Step 2 — Add Chia Seeds and Sweetener, Then Stir
To your pumpkin-milk mix, add the chia seeds along with your chosen sweetener and warming spices. Stir thoroughly until the chia seeds are evenly distributed; these little seeds are the stars that thicken the pudding. You’ll notice the mixture starts off thin—that’s normal. Stirring well helps avoid clumps and ensures a smooth pudding later.
Step 3 — Let It Rest and Thicken
Cover your bowl or divide the pudding into individual jars, then pop them in the fridge. The chia seeds need at least 4 hours to absorb the liquid and turn that silky, gel-like texture you want—but overnight is best. During this time, you’ll notice the pudding transforms from runny to beautifully thick and spoonable. Patience here really pays off!
Things to Remember
This Easy Pumpkin Chia Seed Pudding Recipe is wonderfully forgiving, but a few little touches can make a big difference in texture and flavor. I've found these tips help me every time.
- Doneness Cue: The pudding is ready when it’s thick and creamy with no liquid pooling on top.
- Temperature Trick: Always chill it in the fridge so it sets properly—room temp or warmer won't give you the right texture.
- Make-Ahead Move: Prepare it the night before for a quick grab-and-go breakfast or snack the next day.
- Common Pitfall: Don’t skip stirring the mixture after 10 minutes of refrigerating to prevent seeds from sinking and clumping.
Ways to Serve It
Finishing Touches
I love adding a dollop of Greek yogurt or a drizzle of nut butter on top for some extra creaminess and a touch of protein. A sprinkle of toasted pecans or a handful of pomegranate seeds adds crunch and a pop of color that makes each bite exciting. These little toppings really elevate the humble pudding, making it feel special every time you eat it.
Plays Well With
This pudding pairs beautifully with warm spiced tea or a cup of black coffee. If you want a balanced meal, serve alongside a crisp green salad or a slice of gluten-free toast topped with avocado. The creaminess and spices in the pumpkin pudding complement savory flavors surprisingly well.
Simple Plating Upgrades
To make your pudding look as good as it tastes for guests or a special breakfast, serve it in small clear glasses to show off the creamy orange hue. Layer it with granola or fresh fruit on top for a parfait effect that’s both inviting and Instagram-worthy—simple but effective when you want to impress without fuss.
Make-Ahead & Keeping Fresh
Storing Leftovers
Keep your leftover pumpkin chia seed pudding in airtight glass jars or containers in the fridge. It will stay fresh and creamy for up to 4 days. You might notice the chia thickens a little more over time; a quick stir before serving brings back the perfect consistency.
Freezing Tips
This pudding isn’t the best candidate for freezing because the texture can separate and become grainy after thawing. I recommend enjoying it fresh or refrigerated instead to keep that smooth, luscious feel. If you do freeze it, thaw it slowly overnight and stir well before eating.
Reheating Easy Pumpkin Chia Seed Pudding Recipe Without Drying Out
Generally, I don't recommend heating this pudding because it’s best served chilled to maintain its gel-like texture. However, if you prefer it warm, microwave it gently in short bursts, stirring between intervals to keep it creamy—add a splash of milk or cream to prevent drying out. Avoid the oven or air fryer, as they can quickly dry or curdle the pudding.
Frequently Asked Questions
It's best to use pure pumpkin purée because pumpkin pie filling contains added sugars and spices, which can throw off the flavor and sweetness of your pudding.
Chia seeds typically take about 4 hours to fully absorb the liquid and thicken into pudding, but I always recommend letting it sit overnight for the best texture.
Absolutely! Just use a plant-based milk like almond, oat, or coconut milk, and a vegan sweetener like maple syrup or agave.
Yes! You can fold in mashed banana, swirl in almond butter, or top the pudding with fresh berries or toasted nuts for extra flavor and texture.
Final Thoughts
This Easy Pumpkin Chia Seed Pudding Recipe is a comforting and nourishing way to embrace the flavors of the season, or anytime you want an easy, healthful treat. I love how quickly it comes together and how versatile it is—you really can’t go wrong. Give it a try, customize it with your favorite toppings, and enjoy that cozy, creamy goodness spoonful after spoonful.
PrintFull Printable Recipe
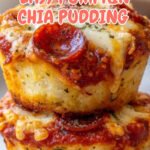
Easy Pumpkin Chia Seed Pudding Recipe
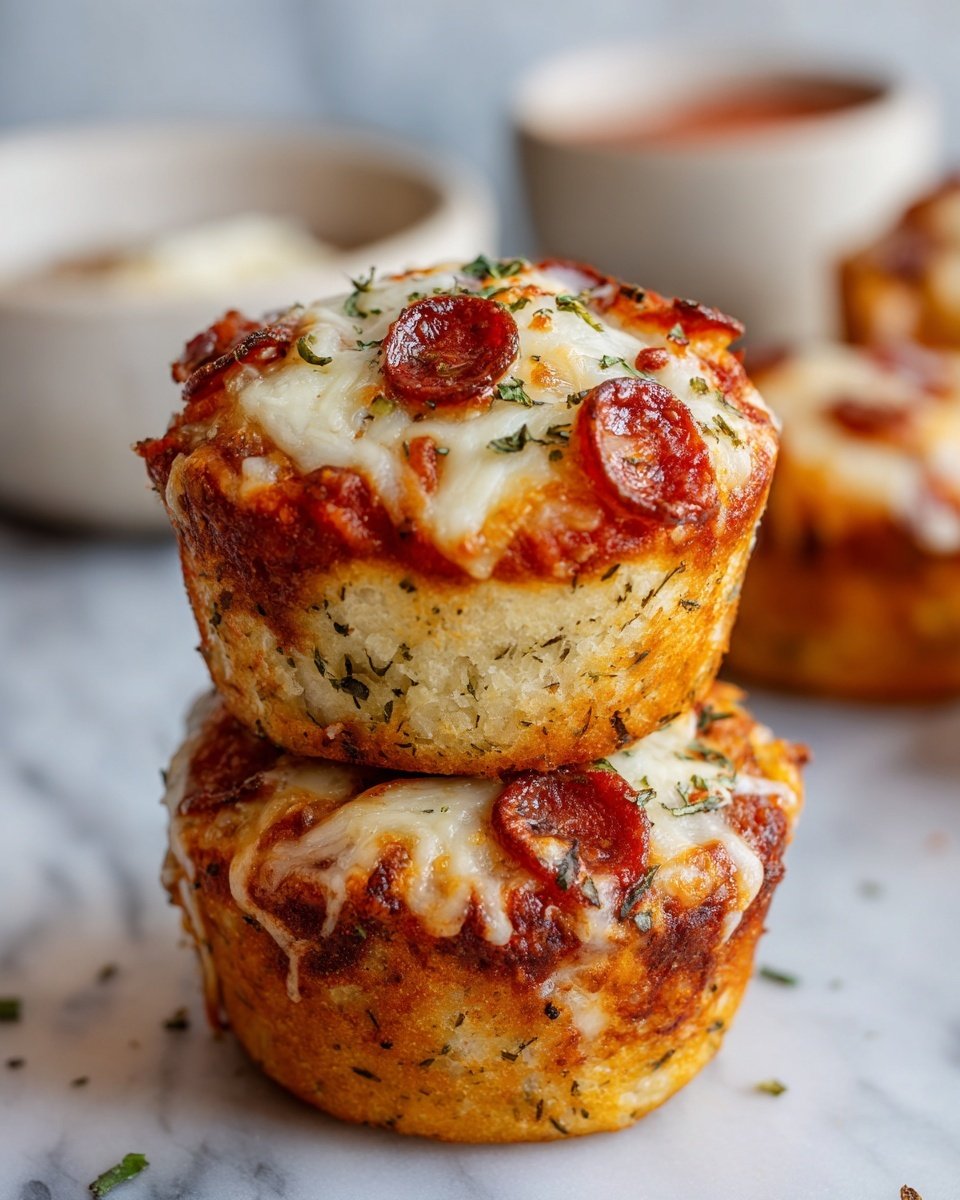
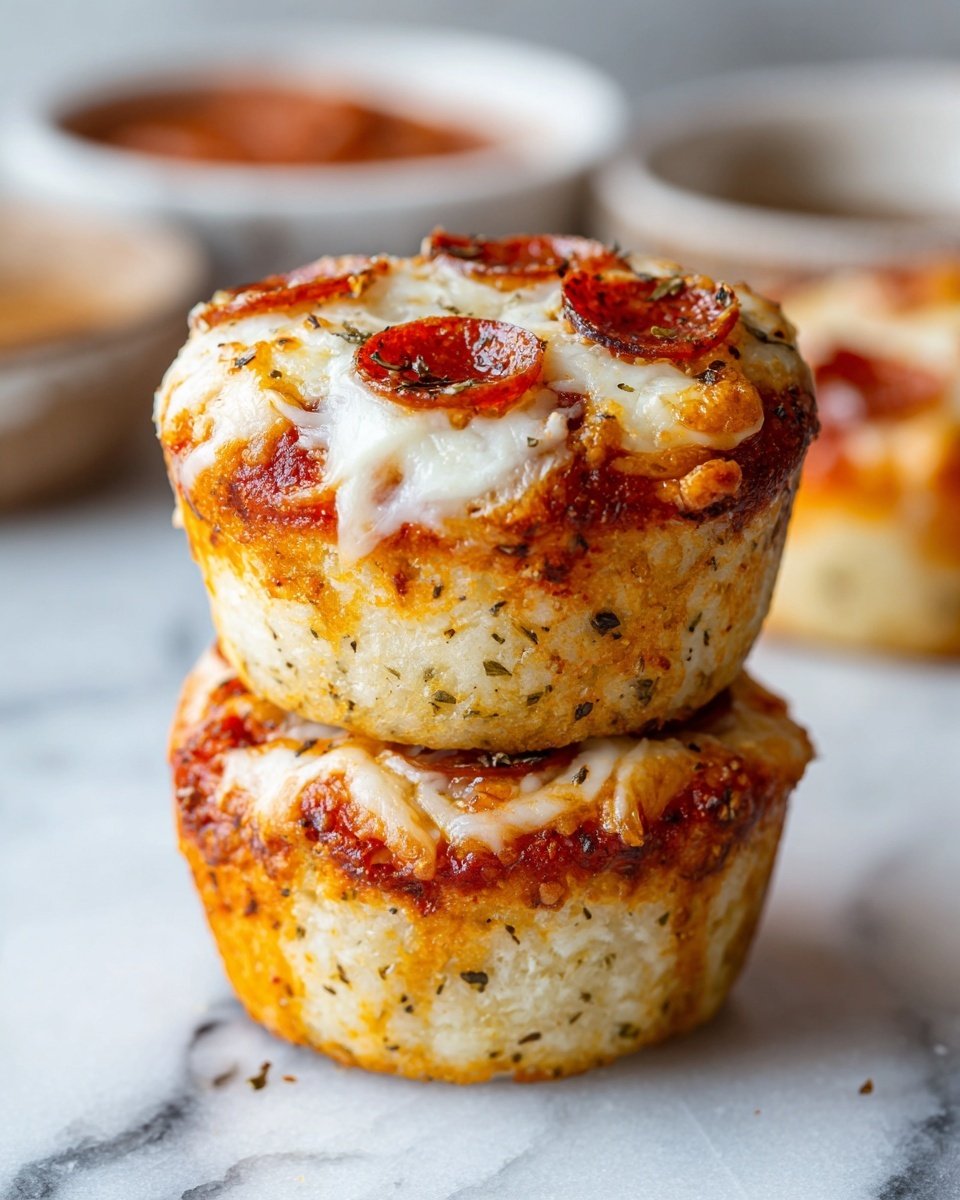
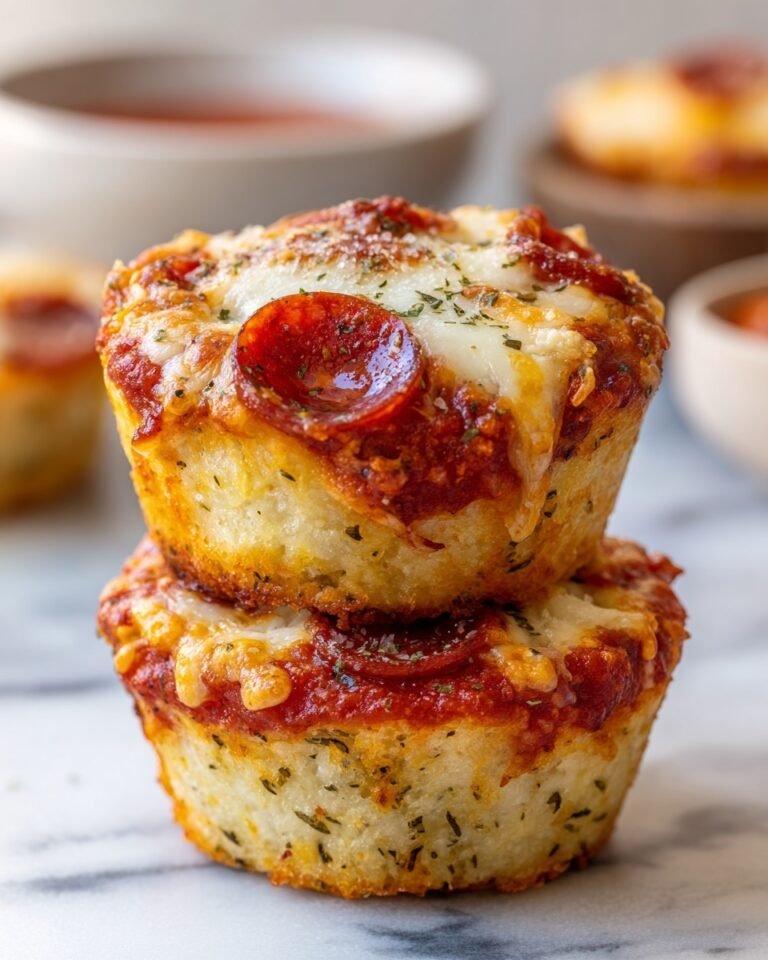
These Gluten-Free Pizza Bites are a delicious and easy-to-make snack or appetizer featuring a soft, cake-like crust made from gluten-free Bisquick mix, topped with mozzarella cheese, pizza sauce, and your favorite toppings. Perfectly portioned in a muffin pan and baked until golden, they offer a convenient and tasty gluten-free alternative to traditional pizza.
- Total Time: 25 minutes
- Yield: 12 servings
Ingredients
Crust Ingredients
- 1 ⅓ cups Bisquick Gluten Free mix
- ½ teaspoon garlic powder
- 1 teaspoon basil
- 1 teaspoon oregano
- ½ cup water
- ⅓ cup olive oil
- 2 eggs, beaten
Toppings
- Cooking spray (olive oil cooking spray preferred)
- Shredded mozzarella cheese (or dairy-free shredded cheese)
- Gluten-free pizza or spaghetti sauce (Prego recommended)
- Favorite pizza toppings (optional)
Instructions
- Preheat oven: Preheat your oven to 425° F to prepare for baking the pizza bites.
- Prepare egg mixture: In a medium bowl, beat the two eggs thoroughly. Add garlic powder, basil, and oregano to the eggs and stir until fully combined for flavor.
- Mix batter: Add the gluten-free Bisquick mix, water, and olive oil to the egg mixture. Stir until fully combined. The batter will be thin, similar to cake batter consistency.
- Prepare muffin pan: Spray a regular-sized muffin pan with olive oil cooking spray to prevent sticking.
- Fill muffin tins: Use a greased ice cream scoop or spoon to fill each muffin tin about three-quarters full with the crust batter.
- Add cheese and sauce: Sprinkle shredded mozzarella cheese over the batter in each muffin cup. Spoon gluten-free pizza or spaghetti sauce over the cheese, then add another layer of mozzarella cheese on top.
- Add toppings: Add your favorite pizza toppings if desired for extra flavor and texture.
- Bake: Bake the pizza bites in the preheated oven for 15 minutes until the cheese is melted and the crust is cooked through.
- Cool and serve: Allow the pizza bites to cool for 1-2 minutes before removing them from the muffin pan. Serve warm and enjoy!
- Storage: Store any leftovers in an airtight container. Reheat in the microwave or oven before serving again.
Notes
- If you prefer, you can make your own gluten-free mix as referenced in the recipe notes for a homemade crust base.
- Use dairy-free cheese to make this recipe suitable for lactose intolerance or vegan adaptations (though the recipe contains eggs, so not fully vegan).
- Customize pizza toppings to your liking such as pepperoni, olives, mushrooms, or bell peppers.
- Using an ice cream scoop helps portion the batter evenly for consistent-sized bites.
- These pizza bites are best enjoyed fresh but can be stored in the refrigerator for up to 3 days.
- Reheat gently to avoid drying out the crust and toppings.
- Prep Time: 10 minutes
- Cook Time: 15 minutes
- Category: Appetizer
- Method: Baking
- Cuisine: American
- Diet: Gluten Free

Leave a Reply