There’s something truly special about a Classic Strawberry Cheesecake Recipe—it’s the perfect balance of creamy, tangy, and sweet, topped with vibrant red strawberries that always bring a pop of color and flavor. Whether it’s a festive occasion, a Sunday treat, or a moment when you just want to impress friends and family, this cheesecake never disappoints. I love how approachable the recipe is, especially since it’s a no-bake delight that feels fancy but is surprisingly simple to pull off.

Jump to:
In the Kitchen
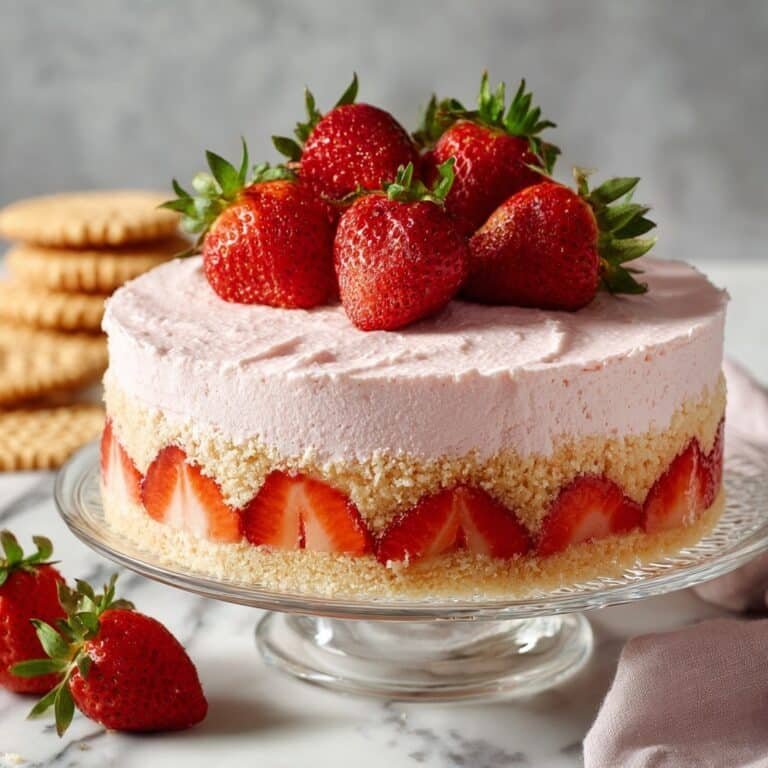
This Classic Strawberry Cheesecake Recipe always delivers that perfect creamy texture and fresh berry tang that's so delightful. I love how the buttery crust holds up just right beneath the light, airy filling topped with juicy strawberries that add just the right amount of brightness.
- Juicy and Tender Every Time: Using fresh strawberries combined with gelatin ensures the topping is luscious and set but still fresh-tasting.
- Golden, Satisfying Finish: A buttery cookie crust creates a lovely contrast in texture and flavor without competing with the creamy layers.
- Simple Ingredients, Big Impact: Minimal pantry staples like cream cheese, powdered sugar, and heavy cream come together for a standout dessert.
- Weeknight to Weekend Ready: The no-bake method lets you easily prep ahead and relax while the cheesecake chills into perfection.
Ingredients at a Glance

Choosing the right ingredients will elevate your Classic Strawberry Cheesecake Recipe to the next level. Don’t rush on quality here — a good cream cheese and fresh strawberries really shine through in the final bite.
- Cookies for the crust: I prefer coconut cookies for a hint of sweetness, but honey graham crackers are a great classic choice that provides nice texture.
- Butter: Use unsalted and melt gently to fully coat the crushed cookies, helping bind the crust evenly.
- Philadelphia cream cheese: Make sure it’s softened to room temperature for smooth blending and no lumps.
- Heavy whipping cream: Always fresh and cold; it whips up thick and adds richness to the cheesecake filling.
- Powdered sugar: Powdered dissolves easily and keeps the filling silky-smooth, avoiding grainy textures.
- Strawberries: Fresh, ripe berries add vibrant color and subtle tartness—try to pick ones that smell fragrant and have a firm but juicy feel.
- Strawberry Gelatin: This is your secret to that perfect set texture without baking and adds beautiful strawberry flavor throughout.
Heads-Up: Exact measurements and detailed steps are in the printable recipe card at the bottom, so you can bake along with confidence!
How to Make Classic Strawberry Cheesecake Recipe
Step 1 — Craft the Perfect Cookie Crust
Start by crushing your choice of cookies finely—but not to dust—so you keep a little texture. I usually toss the cookies into a sturdy plastic bag and use a rolling pin to crush them evenly. Then, melt the butter gently on low heat and stir it through the crushed cookies until every crumb feels glossy and sticky. Press this mixture firmly and evenly into the base of an 8-inch springform pan. Pop it into the fridge for about 20 minutes to let it set up solidly—it’s your crunchy foundation for the cheesecake.
Step 2 — Whip Up a Silky Cream Cheese Filling
Next, soften your cream cheese until it’s as smooth as butter at room temperature—this step makes all the difference to avoid lumps. Combine cream cheese with powdered sugar, cold heavy cream, and whip them together until the mixture becomes thick, silky, and whipped like soft clouds. I love using an electric mixer here to get that perfect, airy texture quickly.
Step 3 — Blend in the Strawberry Gelatin
Prepare the strawberry gelatin according to the package instructions, then let it cool to room temperature. You’ll want to add it carefully to the cream cheese mixture, stirring gently but thoroughly so it combines without clumps. This is what helps your cheesecake set beautifully without baking and infuses it with classic strawberry flavor all the way through.
Step 4 — Assemble and Chill Your Classic Strawberry Cheesecake Recipe
Pour the cheesecake batter right over your chilled crust, smoothing the top with a spatula for an even finish. Now comes the fun part: arrange whole or diced fresh strawberries on top—whether you like neat rows, a scattered look, or a creative pattern, this is your moment to shine. Cover and refrigerate for at least four hours, ideally longer, allowing the cheesecake to set fully so each slice stands tall, creamy, and firm yet tender.
Things to Remember
From years of making this Classic Strawberry Cheesecake Recipe, here’s what I’ve learned to keep it foolproof and delicious.
- Doneness Cue: The filling should be firm to the touch but still creamy inside, not soupy or too stiff.
- Temperature Trick: Let your cream cheese soften at room temp for at least 30 minutes before mixing—it makes blending effortless and smooth.
- Make-Ahead Move: This cheesecake is perfect to make the day before. The flavors meld beautifully overnight, and the texture improves.
- Common Pitfall: Don’t rush chilling time; cutting into a partially set cheesecake leads to a messy slice and less stable texture.
Ways to Serve It

Finishing Touches
I like to brush a thin layer of warmed strawberry jam over the fresh berries for a glossy, bakery-style finish that adds a touch of extra sweetness and helps the berries keep their shape. A sprinkle of finely chopped toasted almonds or a dusting of powdered sugar can also add a little contrast in texture and visual appeal.
Plays Well With
You’ll enjoy pairing this cheesecake with a cup of strong coffee or a fresh herbal tea to balance out the sweetness. A dollop of lightly sweetened whipped cream or a few mint leaves on the side also bring fresh brightness that complements the creamy texture beautifully.
Simple Plating Upgrades
For a quick upgrade, serve slices on white or pastel plates to make the red strawberries pop visually. Adding a small drizzle of chocolate or a few edible flower petals can make this dessert feel special enough for guests or celebrations without much extra effort.
Make-Ahead & Keeping Fresh
Storing Leftovers
Store leftovers tightly covered in an airtight container or wrapped well with plastic wrap to prevent the cheesecake from absorbing fridge odors. The cheesecake will keep in the refrigerator for up to four days, though I recommend enjoying it within two to three days for the freshest texture and flavor.
Freezing Tips
This Classic Strawberry Cheesecake Recipe freezes fairly well. Wrap individual slices tightly in plastic wrap and then foil or place in a freezer-safe container. To thaw, transfer to the refrigerator overnight for best results. Note that fresh strawberries on top might lose some of their texture after freezing, so you might want to add fresh berries when serving.
Reheating Classic Strawberry Cheesecake Recipe Without Drying Out
Cheesecake is best enjoyed chilled, but if you prefer a slightly warmer slice, gently warm it in a microwave on low power in 10-second bursts to avoid drying out or melting. An oven is not recommended as it risks drying the creamy filling. If you want a little warmth, placing the slice on a plate with a damp paper towel nearby in the microwave can help retain moisture.
Frequently Asked Questions
Absolutely! While strawberries are classic here, blueberries, raspberries, or even peaches can be swapped in. Just choose a flavor of gelatin that pairs well with your fruit.
A springform pan is ideal for easy release of the cheesecake without damage, but if you don’t have one, any pan with removable sides or even a regular pan lined with parchment paper will work, just handle carefully.
You could experiment using dairy-free cream cheese and non-dairy whipping cream, but gelatin alternatives like agar-agar are needed since regular gelatin isn’t vegan. The texture and set might vary, so testing is key.
Making it at least 4 hours ahead is essential for setting, but making it the day before is even better for flavor melding and effortless hosting.
Final Thoughts
This Classic Strawberry Cheesecake Recipe is a dessert I keep coming back to, whether to celebrate or just savor something sweet midweek. With its rich, creamy filling and fresh strawberry topping, it strikes a perfect balance of flavor and ease. Trust me, once you make this, you’ll understand why it's such a timeless favorite. Have fun making it your own and enjoy every luscious, toasty-buttery, strawberry-kissed bite.
PrintFull Printable Recipe
Classic Strawberry Cheesecake Recipe
This Classic Strawberry Cheesecake is a creamy, no-bake dessert featuring a buttery cookie crust, smooth cream cheese filling infused with strawberry gelatin, and topped with fresh strawberries for a refreshing finish. Perfect for those who want a delightful, easy-to-make treat without using the oven.
- Total Time: 4 hours 25 minutes
- Yield: 8 servings
Ingredients
Crust
- 2 cups/10 oz crisp cookies of your choice (coconut cookies or honey graham crackers)
- ½ cup butter
Filling
- 1 cup powdered sugar
- 3 packages Philadelphia cream cheese (8 oz each)
- 1 cup heavy whipping cream
- 3 oz/85 g strawberry gelatin
Topping
- 1 ½ cups fresh strawberries (whole or diced)
Instructions
- Crush Cookies: Place the cookies inside a plastic bag and crush them finely using a rolling pin until you achieve a crumbly texture.
- Prepare Crust: Melt the butter in a saucepan over low heat, then stir in the crushed cookies until they are evenly coated. Press this mixture firmly into the bottom of an 8-inch springform pan and refrigerate for about 20 minutes to set.
- Make Filling: In a mixing bowl, beat together the powdered sugar, heavy whipping cream, and cream cheeses until the mixture is smooth and creamy.
- Mix Gelatin: Prepare the strawberry gelatin according to the package's instructions. Allow it to cool to room temperature, then gradually pour it into the cream cheese mixture, blending thoroughly to combine all ingredients.
- Assemble Cheesecake: Spread the filling evenly over the chilled cookie crust. Arrange whole or diced strawberries on top according to your preference.
- Chill: Refrigerate the assembled cheesecake for at least 4 hours or until the filling is fully set.
- Serve: Remove from the refrigerator, slice, and serve chilled for the best flavor and texture.
Notes
- For a firmer crust, you can bake the cookie crust at 350°F (175°C) for 8-10 minutes before refrigerating, though this step is optional.
- If you prefer a sweeter filling, slightly increase the powdered sugar to 1¼ cups.
- Use full-fat cream cheese and heavy whipping cream for the richest texture and flavor.
- Substitute strawberry gelatin with raspberry or cherry gelatin for a different fruit twist.
- Ensure the gelatin is completely cool before adding to prevent curdling or melting the cream cheese mixture.
- For easier slicing, run a knife under hot water before each cut.
- Prep Time: 25 minutes
- Cook Time: 0 minutes
- Category: Dessert
- Method: No-Cook
- Cuisine: American
- Diet: Vegetarian


Leave a Reply