If you’re looking for a fresh twist on a classic, this Chia Seed Pudding with Figs and Pistachios Recipe is exactly what you want to try. It’s a creamy, nutrient-packed breakfast or snack that blends the delicate nuttiness of chia seeds with the sweet juiciness of figs and the satisfying crunch of pistachios. Whenever I want something light yet indulgent, this pudding hits the spot perfectly.

Jump to:
In the Kitchen
I love how versatile and forgiving this Chia Seed Pudding with Figs and Pistachios Recipe is. Whether you’re prepping breakfast the night before or looking for a light dessert, it’s both easy and impressive.
- Juicy and Tender Every Time: Use ripe figs that are soft to the touch for that luscious bite.
- Golden, Satisfying Finish: Toast your pistachios lightly to unlock deep, toasty flavors.
- Simple Ingredients, Big Impact: You only need a handful of pantry staples and a couple fresh elements.
- Weeknight to Weekend Ready: Prep in under 10 minutes and enjoy it anytime you want a healthy pick-me-up.
Ingredients at a Glance

For your Chia Seed Pudding with Figs and Pistachios Recipe, aim for fresh, high-quality figs and raw chia seeds. A good non-dairy or dairy milk of your choice makes all the difference in texture and flavor.
- Chia Seeds: Look for fresh, raw chia seeds; they absorb liquids best and yield that signature pudding texture.
- Figs: Fresh and ripe figs bring juiciness and sweetness; dried figs can work but won’t have the same delicate texture.
- Pistachios: Choose unsalted and ideally raw pistachios for toasting; they add a perfect crunchy contrast.
- Milk (Almond, Oat, or Cow’s): Pick your favorite milk for creaminess; full-fat varieties create a richer pudding.
- Sweetener (Optional): Honey or maple syrup can enhance the natural flavors without overpowering.
Heads-Up: Exact measurements are in the printable recipe card at the bottom.
How to Make Chia Seed Pudding with Figs and Pistachios Recipe
Step 1 — Mix the Base
Start by combining your chia seeds with your choice of milk in a mixing bowl or jar. Use about 3 tablespoons of chia seeds to 1 cup of milk for the best pudding texture. Stir thoroughly so the seeds don’t clump together and soak evenly. You’ll notice the mixture looks runny at first, but that’s perfectly normal.
Step 2 — Sweeten and Chill
If you like your pudding a bit sweeter, now’s the time to add a touch of honey or maple syrup. I usually add just a teaspoon to keep it balanced and natural. Cover the bowl or jar with a lid or plastic wrap and place it in the fridge. It needs to sit for at least 4 hours, but overnight is best — trust me, the texture really blossoms by morning.
Step 3 — Prepare the Figs and Pistachios
While the pudding chills, toast the pistachios in a dry skillet over medium heat for 3–5 minutes until they’re fragrant and slightly golden. This step is key because it deepens their flavor and adds that irresistible crunch. Meanwhile, slice your fresh figs into quarters or halves, depending on size. The figs should feel tender and juicy when touched.
Step 4 — Assemble and Serve
Once your pudding has thickened to a creamy, spoonable consistency, give it a good stir to break up any clumps. Spoon it into serving jars or bowls, then scatter the toasted pistachios and fresh figs on top. You’ll see the beautiful color contrast at play, and the first bite is just heavenly — creamy, crunchy, and fruity all in one.
Things to Remember
This Chia Seed Pudding with Figs and Pistachios Recipe is all about timing and texture. It’s easy to get a perfect result once you know what to watch for.
- Doneness Cue: The pudding is ready when it’s thick but still creamy and scoopable without being gluey.
- Temperature Trick: Use chilled ingredients or keep the pudding refrigerated — warmth can thin out the pudding.
- Make-Ahead Move: The pudding keeps beautifully for up to 4 days, making it a stellar meal prep option.
- Common Pitfall: Don’t skip stirring after chilling; it helps smooth out the pudding for a nicer bite.
Ways to Serve It

Finishing Touches
Adding a drizzle of honey or a sprinkle of cinnamon on top elevates this Chia Seed Pudding with Figs and Pistachios Recipe beautifully. A few mint leaves or a dusting of nutmeg can bring in freshness and aroma, making every spoonful feel special.
Plays Well With
You’ll find it pairs wonderfully with a side of tart Greek yogurt for extra creaminess, or alongside a handful of fresh berries to add brightness. If you want to keep it simple, a hot cup of herbal tea complements the pudding’s natural sweetness perfectly.
Simple Plating Upgrades
Layer your pudding in clear glass jars or bowls so the layers of creamy pudding, glossy figs, and crunchy pistachios show off beautifully. Top with whole figs and a few pistachios for a rustic, inviting look that’s perfect for breakfast on a lazy weekend or pretty enough for guests.
Make-Ahead & Keeping Fresh
Storing Leftovers
Keep your pudding stored in airtight containers or covered bowls in the fridge. It stays fresh and creamy for up to 4 days, though the texture of the figs and nuts might change slightly if stored longer. Stir gently before serving to freshen it up.
Freezing Tips
I don’t recommend freezing chia seed pudding with fresh figs and pistachios because the figs’ texture becomes mushy and the nuts can get soggy. It’s best enjoyed fresh or refrigerated for a few days to keep all those lovely textures intact.
Reheating Chia Seed Pudding with Figs and Pistachios Recipe Without Drying Out
Since this recipe shines when served chilled, I usually don’t reheat it. But if you’d like a warmer version, gently warm it in the microwave in short 10-second bursts, stirring between each. Adding a splash of milk while reheating keeps it creamy and prevents drying out.
Frequently Asked Questions
You can, but dried figs lack the juicy softness of fresh figs and may need extra soaking. Fresh figs provide the best texture for this recipe.
Absolutely! Use plant-based milk like almond, oat, or coconut milk, and choose a sweetener like maple syrup to keep it vegan-friendly.
Stored properly in an airtight container, it stays fresh and delicious for up to 4 days. Beyond that, texture and flavor start to decline.
Yes, the pudding is naturally mild with the figs adding sweetness — omit sweeteners for a less sweet, more natural flavor.
Final Thoughts
This Chia Seed Pudding with Figs and Pistachios Recipe feels like a little celebration in a jar — easy to put together, endlessly customizable, and just as good for your body as it is for your taste buds. I hope you enjoy making it as much as I do, whether it’s a cozy morning treat or a healthful snack to brighten any moment.
PrintFull Printable Recipe
Chia Seed Pudding with Figs and Pistachios Recipe
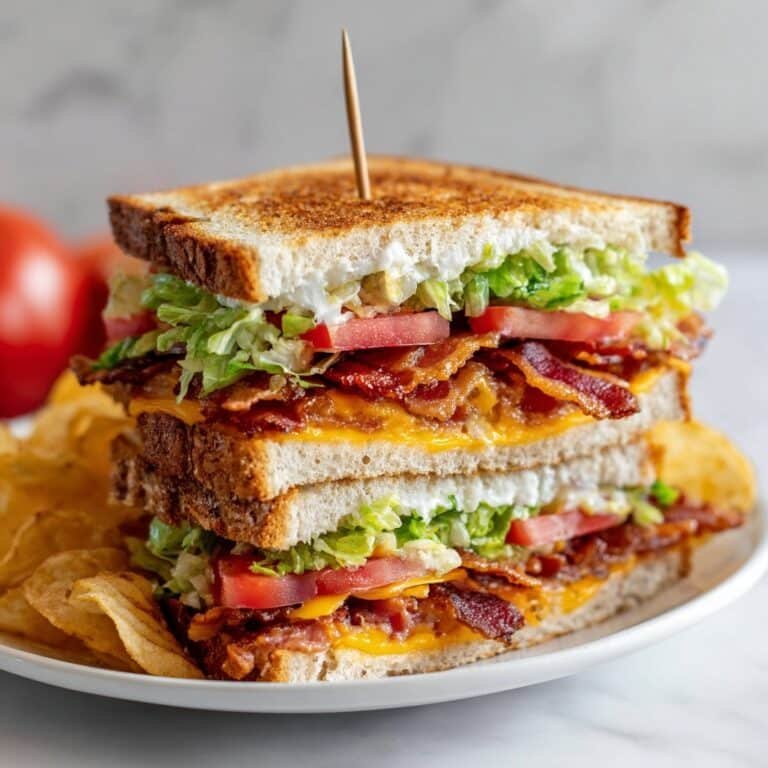
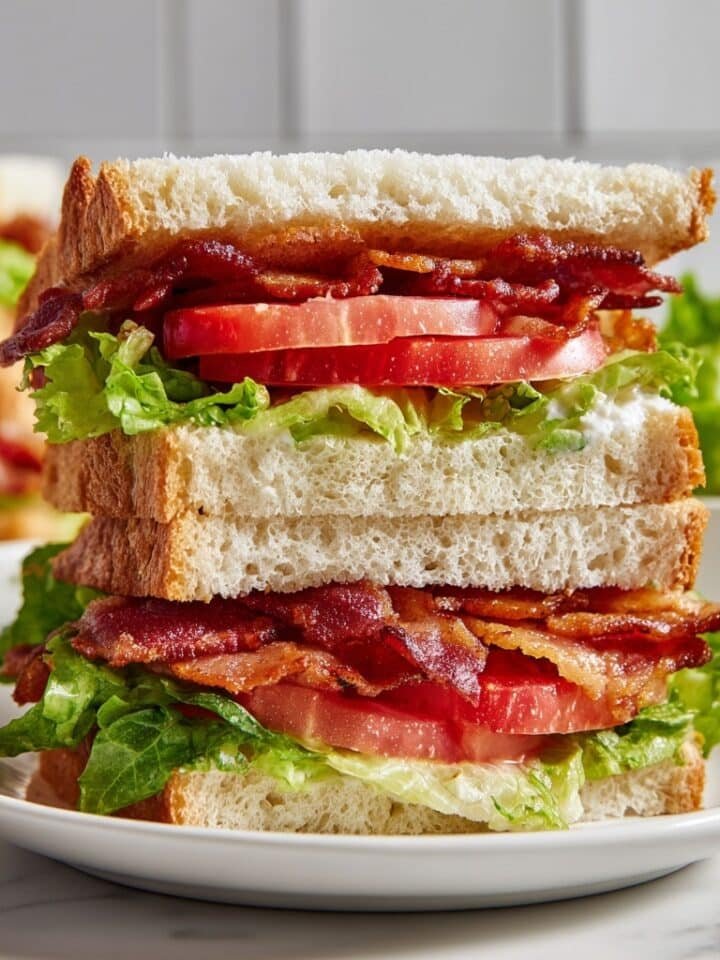
A classic Chicken Club Sandwich featuring layers of deli chicken, bacon, lettuce, tomato, American cheese, and mayonnaise, all stacked between crispy toasted white bread slices for a deliciously satisfying meal.
- Total Time: 15 minutes
- Yield: 1 sandwich
Ingredients
Bread and Condiments
- 3 slices white bread
- 2 tablespoon mayonnaise
Fillings
- 2 lettuce leaves
- 2 slices deli chicken breast
- 2 slices American cheese
- 4 slices cooked bacon
- 1 tomato, sliced
Instructions
- Toast Bread: Toast three slices of white bread until they become crispy and golden brown on both sides to provide a sturdy base for the sandwich.
- Spread Mayonnaise: Evenly spread a thin layer of mayonnaise on one side of each toasted bread slice to add moisture and flavor.
- Assemble Base Layer: Place one slice of bread on a plate mayo-side up. Layer on one lettuce leaf, followed by one slice of deli chicken breast, one slice of American cheese, and two slices of crispy cooked bacon.
- Add Middle Bread Layer: Place the second slice of bread on top of the fillings, mayo-side down. Then spread a small amount of mayonnaise on the top side of this second slice to help the next toppings stick.
- Add Second Filling Layer: On top of the second bread slice, add another lettuce leaf, one slice of deli chicken breast, one slice of American cheese, two bacon slices, and a few slices of fresh tomato for juiciness.
- Finish with Top Bread Slice: Place the third slice of bread on top, mayo-side down, completing the sandwich structure.
- Press and Slice: Gently press the sandwich together to help it hold its shape. Then slice the sandwich diagonally or into quarters for easy serving.
- Serve and Enjoy: Serve immediately to enjoy the sandwich at its best when the bread is still crisp and the ingredients fresh and flavorful.
Notes
- Use cooked bacon for a crispy texture and enhanced flavor.
- To make the sandwich easier to handle, pressing it gently helps keep the layers intact.
- Feel free to substitute white bread with whole wheat or multigrain for added fiber and nutrition.
- For a healthier version, consider using low-fat mayonnaise or mustard instead.
- Tomato slices add juiciness; make sure they’re not too thick to avoid sogginess.
- Prep Time: 10 minutes
- Cook Time: 5 minutes
- Category: Lunch
- Method: Stovetop
- Cuisine: American


Leave a Reply