If you’re craving a dessert that’s rich, smooth, and packed with that uniquely spiced caramel flavor, then you’re in for a treat with this Biscoff Cheesecake Recipe. Perfect for celebrations, cozy weekends, or whenever you want to impress friends and family, this cheesecake blends the buttery crunch of Biscoff cookies with a luscious, creamy filling. I love how it’s both comforting and a little indulgent—trust me, you’ll want to make it again and again!

Jump to:
In the Kitchen
What makes this Biscoff Cheesecake Recipe stand out is how it balances creamy richness with that signature caramel-spiced cookie flavor. You’ll notice the crust stays crisp yet tender, while the filling is luxuriously smooth and fluffy thanks to the whipped cream.
- Juicy and Tender Every Time: Folding whipped cream into the cream cheese mixture lightens the texture beautifully without losing richness.
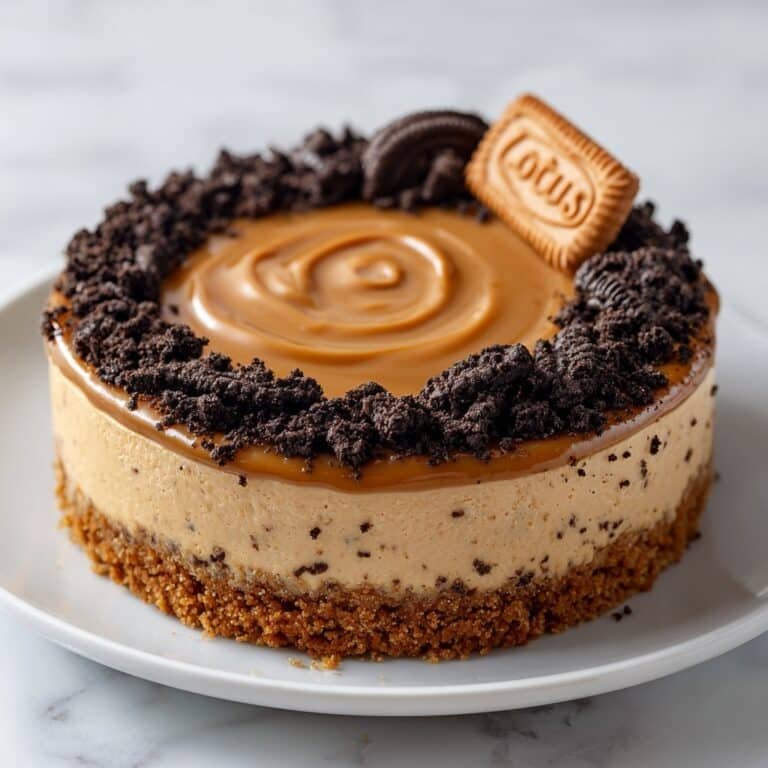
- Golden, Satisfying Finish: The glossy Biscoff topping adds a toasty sweetness, perfectly tying all the flavors together.
- Simple Ingredients, Big Impact: With just a handful of pantry staples and Biscoff staples, it’s surprisingly straightforward yet impressive.
- Weeknight to Weekend Ready: Make it ahead for effortless entertaining or treat yourself after a long day.
Ingredients at a Glance

When it comes to the Biscoff Cheesecake Recipe, quality ingredients really do make a difference. I always recommend using fresh cream cheese and the classic Lotus Biscoff spread and cookies—they bring that distinctive flavor you want. A good unsalted butter will give your crust a rich base without overpowering the delicate filling.
- Biscoff Cookies: Crush them finely for the crust but keep some slightly chunkier for garnish to add texture contrast.
- Unsalted Butter: Melt it gently and use high-quality for the best buttery flavor binding the crust.
- Cream Cheese: Soften at room temperature for a smooth, lump-free filling.
- Biscoff Spread: Use the original Lotus brand if you can—it’s the heart and soul of this recipe.
- Heavy Cream: Make sure it’s cold before whipping so you get the perfect peaks and airy texture.
Heads-Up: Exact measurements are in the printable recipe card at the bottom.
How to Make Biscoff Cheesecake Recipe
Step 1 — Prepare the Crunchy Biscoff Crust
Start by crushing your Biscoff cookies into fine crumbs—either with a food processor or by placing them in a sealed bag and rolling a rolling pin over them. Mix the crumbs with melted unsalted butter until fully combined. You’re aiming for a texture like wet sand that will hold together well. Press this mixture evenly into the bottom of a 9-inch springform pan, using the bottom of a glass or your fingers to compact it firmly. Pop it in the fridge to chill while you move on to the filling. I find chilling helps the crust set perfectly and prevents sogginess later on.
Step 2 — Whip Up the Creamy Biscoff Filling
In a bowl, beat softened cream cheese and granulated sugar together until smooth and creamy—no lumps here! Add in the Biscoff spread and vanilla extract, mixing until fully blended and fragrant. In a separate chilled bowl, whip the cold heavy cream to soft peaks; this means when you lift the whisk, the cream holds shape but curls back gently. Folding the whipped cream gently into the cream cheese mixture is key here, so your cheesecake filling stays light and fluffy without deflating. If you’re feeling adventurous, stirring in melted dark chocolate chips at this stage adds a decadent twist you won’t regret.
Step 3 — Layer and Chill for the Perfect Set
Pour half the filling over the chilled crust, smoothing it carefully. For a lovely textural surprise, sprinkle a few crushed Biscoff cookie bits over this layer. Then spread the remaining filling on top and smooth out the surface. Cover with plastic wrap and refrigerate for at least 6 hours, though overnight is best if you can plan ahead. This resting time allows the flavors to develop and ensures your Biscoff Cheesecake Recipe has that rich, silky texture you’re aiming for.
Step 4 — Glaze and Garnish with Biscoff Goodness
To finish, gently warm the heavy cream and Biscoff spread together until smooth—either on the stovetop over low heat or in brief microwave bursts. Let this glaze cool slightly before pouring it evenly over the chilled cheesecake. This shiny layer adds a luscious, toasty finish that’s impossible to resist. Top with extra crushed Biscoff cookies and chocolate shavings for that picture-perfect look and a little extra crunch. Serve it chilled, slice carefully, and savor every bite!
Things to Remember
From my experience, a few little touches make all the difference when you’re making this Biscoff Cheesecake Recipe. Take your time with each step, and keep an eye on texture cues to get the perfect result you’ll be proud of.
- Doneness Cue: The cheesecake should be set around the edges but still slightly jiggly in the center after chilling—it firms up as it cools.
- Temperature Trick: Soften cream cheese at room temp, but keep your heavy cream cold until whipping for best results.
- Make-Ahead Move: This cheesecake tastes even better the next day, so plan to prepare it well ahead for stress-free entertaining.
- Common Pitfall: Overmixing the filling after adding whipped cream can deflate it—fold gently to keep it light.
Ways to Serve It

Finishing Touches
For me, the finishing touches make this Biscoff Cheesecake Recipe feel really special. That warm glaze poured over, plus a sprinkle of crushed cookies and a few chocolate shavings, transforms it from everyday dessert to showstopper. You could even add a dollop of lightly whipped cream on each slice for extra decadence.
Plays Well With
This cheesecake’s caramel spice profile pairs beautifully with fresh berries like raspberries or sliced strawberries. A drizzle of salted caramel sauce or a scoop of vanilla bean ice cream on the side adds lovely contrast and bursts of freshness against that rich base.
Simple Plating Upgrades
For a quick style boost, serve slices on rustic wooden boards or elegant white plates. Garnish with mint leaves or edible flowers if you want to impress guests. Even simple gold forks make that bite feel a little more festive without any extra effort in the kitchen.
Make-Ahead & Keeping Fresh
Storing Leftovers
Store your leftover Biscoff cheesecake in an airtight container or cover the springform pan well with plastic wrap. It keeps beautifully in the fridge for up to 4 days, retaining that creamy texture without drying out. I find it tastes just as fresh on day two, which is perfect for extended indulgence.
Freezing Tips
This cheesecake freezes quite well if you want to prepare in advance or save extras. Wrap it tightly in plastic wrap and then a layer of foil to protect against freezer burn. Thaw it overnight in the fridge before serving. Texture might soften slightly, but the flavor remains deliciously intact.
Reheating Biscoff Cheesecake Recipe Without Drying Out
I usually enjoy this cheesecake chilled, but if you want to serve it slightly warmer, place slices on a microwave-safe plate and heat at 20-second intervals on low power, just until it’s slightly soft but not melted. Avoid overheating to keep that creamy mouthfeel. If using an oven or air fryer, warm at 275°F (135°C) for 5-7 minutes wrapped loosely in foil to preserve moisture.
Frequently Asked Questions
While peanut butter offers richness, it doesn’t have the signature spiced caramel flavor of Biscoff spread. For the authentic taste of this recipe, I recommend sticking to Lotus Biscoff spread if possible.
Cracks often happen when the cheesecake is overbaked or cooled too quickly. To avoid this, bake gently and let it cool gradually at room temperature before chilling.
Absolutely! You can use milk chocolate or white chocolate chips, or omit them entirely for a pure Biscoff flavor. It’s a flexible recipe that adapts well.
Stored properly in an airtight container, it stays fresh for up to 4 days, making it a perfect make-ahead treat.
Final Thoughts
Making this Biscoff Cheesecake Recipe is truly a joy, especially when you see the delight on your family or guests’ faces. It’s comforting but also feels special enough for any occasion. I hope you enjoy this recipe as much as I do—it’s one that I come back to whenever I want that perfect combination of creamy, crunchy, and caramel-spiced bliss. Don’t forget to take your time with each step, and let me know how yours turns out!
PrintFull Printable Recipe
Biscoff Cheesecake Recipe
A decadent and creamy Biscoff Cheesecake featuring a crunchy Biscoff cookie crust, luscious Biscoff-flavored cream cheese filling, optional chocolate twist, and a smooth Biscoff topping with decorative garnishes. Perfect for dessert lovers craving a rich, spiced cookie flavor.
- Total Time: 6 hours 30 minutes
- Yield: 12 servings
Ingredients
For the Crust:
- 2 cups crushed Biscoff cookies (250 g)
- 7 tablespoon unsalted butter, melted (100 g)
For the Filling:
- 16 oz cream cheese, softened (500 g)
- ½ cup granulated sugar (100 g)
- ¾ cup Biscoff spread (200 g)
- 1 teaspoon vanilla extract (5 ml)
- ¾ cup heavy cream, cold (200 ml)
- ⅔ cup dark chocolate chips, melted (optional) (100 g)
For the Topping:
- ⅓ cup heavy cream (100 ml)
- 3 tablespoon Biscoff spread (50 g)
- Crushed Biscoff cookies and chocolate shavings, for garnish
Instructions
- Prepare the crust: Crush the Biscoff cookies into fine crumbs. Mix the crumbs thoroughly with the melted unsalted butter. Press this mixture evenly into the bottom of a 9-inch (23 cm) springform pan to form the crust. Place it in the refrigerator to chill while preparing the filling.
- Make the filling: In a mixing bowl, beat the softened cream cheese together with granulated sugar until the mixture is smooth and creamy. Add the Biscoff spread and vanilla extract and mix until fully incorporated. In a separate bowl, whip the cold heavy cream until soft peaks form, then gently fold this whipped cream into the cream cheese mixture until uniform. For a chocolate variation, fold in the melted dark chocolate chips gently.
- Assemble the layers: Spread half of the filling evenly over the chilled crust. Sprinkle crushed Biscoff cookies on top for texture, if desired. Then, spread the remaining filling over the cookies to create two layers. Smooth the surface, cover the cheesecake, and refrigerate for at least 6 hours or overnight to set properly.
- Prepare the topping: Warm the heavy cream and Biscoff spread together in a small saucepan over low heat or briefly in the microwave until smooth and combined. Allow the mixture to cool slightly before pouring it gently over the chilled cheesecake surface.
- Garnish and serve: Decorate the cheesecake with additional crushed Biscoff cookies and chocolate shavings on top. Slice carefully and serve chilled for the best texture and flavor experience.
Notes
- For a firmer crust, press the cookie and butter mixture firmly and chill for at least 30 minutes before adding the filling.
- You can substitute dark chocolate chips with white chocolate or omit them for a classic Biscoff flavor.
- Ensure the cream cheese is softened to room temperature to avoid lumps in the filling.
- Use a springform pan for easy removal of the cheesecake without damaging the shape.
- Chilling overnight enhances the cheesecake’s texture and flavor infusion.
- Store leftover cheesecake in the refrigerator and consume within 3-4 days for optimal freshness.
- Prep Time: 30 minutes
- Cook Time: 0 minutes
- Category: Dessert
- Method: No-Cook
- Cuisine: American


Leave a Reply