If you’ve ever wanted a cozy, sweet dessert that feels like a warm hug on a chilly day, this Classic Apple Crisp Recipe is your answer. It’s one of those go-to treats I turn to when fresh apples are in season, and it’s perfect for everything from weeknight dinners to holiday gatherings because it’s fuss-free but bursting with flavor.

Jump to:
In the Kitchen
This Classic Apple Crisp Recipe is such a joy to make because it combines tender, juicy apples with a toasty, crunchy topping that’s delightfully simple to prepare. It’s approachable for bakers of all levels and fills your kitchen with that irresistible apple-cinnamon aroma that gets everyone eager for dessert.
- Juicy and Tender Every Time: Tossing the apples with lemon juice and cinnamon balances sweetness while keeping the fruit from browning and staying flavorful.
- Golden, Satisfying Finish: The buttery oat topping crisps up beautifully in the oven, offering a contrast to soft apples beneath.
- Simple Ingredients, Big Impact: With pantry staples like oats, flour, and butter, it’s easy to whip up even on short notice.
- Weeknight to Weekend Ready: It’s just as good served warm on a busy Tuesday or amplified with ice cream for a cozy weekend treat.
Ingredients at a Glance

Choosing the right apples and quality ingredients really makes this Classic Apple Crisp Recipe shine. I always opt for a mix of tart and sweet apples to create a layered flavor profile that isn’t too sugary.
- Apples: Go for firm varieties like Granny Smith, Honeycrisp, or Fuji for balance in tartness and sweetness.
- Lemon juice: It brightens the apple flavor and keeps slices from turning brown.
- Sugar & cinnamon: Classic combo that adds warmth and sweetness; adjust the sugar if you prefer tartness.
- Rolled oats: Provide chewy texture and a nutty crunch for the topping.
- All-purpose flour: Helps bind the oat topping into golden crumbs.
- Brown sugar: Adds moisture and depth with its molasses notes.
- Unsalted butter: Softened butter is key for that tender, crisp topping you’ll love.
Heads-Up: Exact measurements are in the printable recipe card at the bottom.
How to Make Classic Apple Crisp Recipe
Step 1 — Prepare Your Apples for Maximum Juiciness
Start by peeling, coring, and slicing 6 to 8 apples into even pieces — about ¼-inch thick works perfectly. Toss the slices gently in a large bowl with a tablespoon of fresh lemon juice, half a cup of sugar, and a teaspoon of cinnamon. This mix brings out the apples’ sweetness while keeping them slightly tart and beautifully fragrant. When you spread the mixture into your greased baking dish, aim for an even layer so every bite is packed with tender apple goodness.
Step 2 — Create the Perfect Crumbly Topping
In a separate bowl, combine one cup rolled oats, one cup all-purpose flour, half a cup packed brown sugar, and half a cup softened unsalted butter. I love using my fingers here to rub the butter into the dry ingredients until the mixture looks crumbly and pebbly, almost like coarse sand. This tactile step is key for getting that satisfyingly crunchy topping. Sprinkle the mixture evenly over the apples, covering every bit so the topping bakes golden and crisp all around.
Step 3 — Bake to Golden Perfection
Pop your dish in a preheated oven at 350°F (175°C) and bake for 30 to 35 minutes. You’ll notice the oat topping turning a gorgeous golden brown and the apple juices bubbling happily underneath. If you peek before 30 minutes, be patient — that warm, crusty topping is worth the wait. When it’s done, the apples should be tender but not mushy, giving you just the right balance of soft fruit and crunchy topping.
Things to Remember
When making this Classic Apple Crisp Recipe, small details make a big difference—like how you slice your apples and the texture of your topping. A few tips from my kitchen to yours:
- Doneness Cue: Look for bubbling juices and a golden-brown crisp topping — those are sure signs it’s ready.
- Temperature Trick: Keep your oven steady at 350°F to avoid burning the topping before the apples soften.
- Make-Ahead Move: You can prep the fruit and topping separately a day ahead; just assemble and bake when ready.
- Common Pitfall: Don’t skip the lemon juice — it prevents browning and adds brightness that balances sweetness.
Ways to Serve It

Finishing Touches
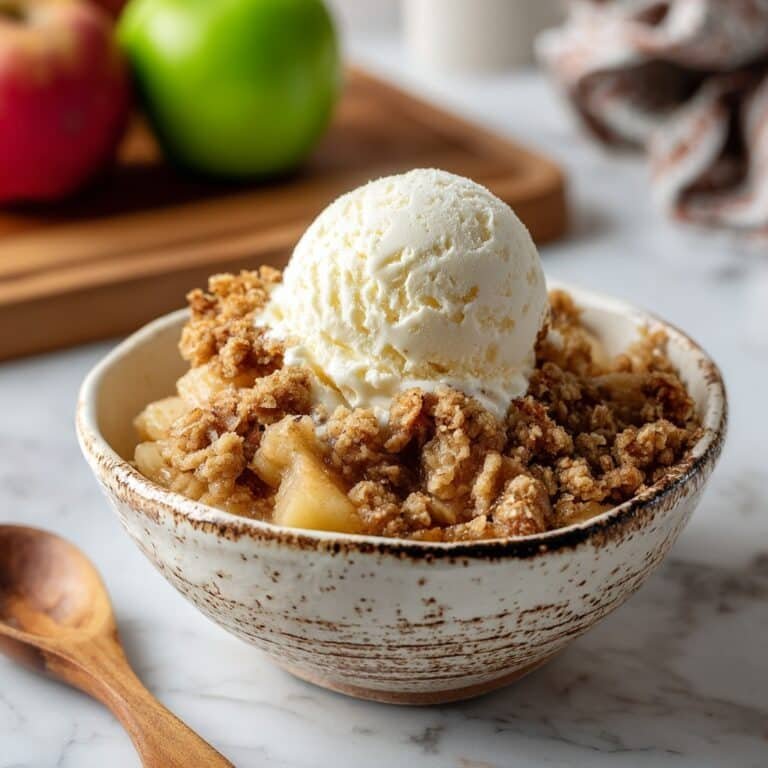
Nothing’s quite like a warm scoop of vanilla ice cream melting into the golden crust of this Classic Apple Crisp Recipe. But if you want to get creative, a drizzle of caramel sauce or a sprinkle of toasted nuts on top adds wonderful texture and richness. These extras make it feel indulgent without complicating the simple joy of baked apples and oats.
Plays Well With
For a balanced dessert spread, try pairing your apple crisp with a sharp cheddar cheese or a dollop of whipped cream to cut through the sweetness. A hot cup of cinnamon-spiced tea or coffee complements the warm spices perfectly, turning your crisp into a full sensory experience.
Simple Plating Upgrades
Serve individual portions in cute ramekins for a charming touch, or add a sprig of fresh mint or a dusting of powdered sugar on top to impress guests with zero extra effort. I’ve found that rustic plates or wooden boards bring out the homey vibe of this dessert beautifully.
Make-Ahead & Keeping Fresh
Storing Leftovers
Store leftover apple crisp covered tightly with foil or plastic wrap in an airtight container in the fridge for up to 4 days. The topping softens a bit but the flavors deepen, making for a delicious next-day treat. I recommend reheating gently to bring back some crispness.
Freezing Tips
This Classic Apple Crisp Recipe freezes surprisingly well. Freeze in an airtight container before baking or after it’s cooled if you want to enjoy it later. To thaw, pop it in the fridge overnight, then warm it up to recover that just-out-of-the-oven vibe. The texture might be a little softer than fresh, but the flavor will still make you smile.
Reheating Classic Apple Crisp Recipe Without Drying Out
To avoid drying out, reheat your apple crisp in the oven at 325°F for 10 to 15 minutes, tented loosely with foil to keep moisture in. Microwaving works for a quick fix, but be sure to cover it to trap steam. An air fryer can crisp the topping again in just a few minutes — just watch closely so it doesn’t burn.
Frequently Asked Questions
Absolutely! Pears, peaches, or berries make great substitutes or additions, though baking times might vary slightly. Just choose fruits that hold their shape when baked.
Serve the crisp soon after baking or reheat briefly in the oven or air fryer. Cover leftovers loosely to prevent moisture from making the topping soggy.
Yes! Use gluten-free rolled oats and substitute the all-purpose flour with a gluten-free blend for a safe and tasty alternative.
Both options work well. Freeze uncovered before baking for fresh-baked results later, or freeze fully baked and thaw gently for convenience.
Final Thoughts
I love how versatile and comforting this Classic Apple Crisp Recipe is, whether it’s a last-minute dessert or the main event of a cozy dinner. With a balance of tender apples and a crisp, buttery topping, it’s earned a permanent spot in my baking rotation. Once you try it, you’ll see it’s not just a recipe—it’s a reliable, delicious way to celebrate seasonal fruit and treat yourself with ease.
PrintFull Printable Recipe
Classic Apple Crisp Recipe
Classic Apple Crisp is a warm and comforting dessert featuring tender cinnamon-spiced apples topped with a buttery oat crumble. Perfectly baked to golden perfection, it’s a delightful treat served best warm, optionally with ice cream.
- Total Time: 55 minutes
- Yield: 6 servings
Ingredients
Apple Filling
- 6 cups apples, peeled, cored, and sliced
- 1 tablespoon lemon juice
- ½ cup sugar
- 1 teaspoon cinnamon
Oat Crumble Topping
- 1 cup rolled oats
- 1 cup all-purpose flour
- ½ cup brown sugar, packed
- ½ cup unsalted butter, softened
Instructions
- Preheat Oven: Preheat your oven to 350°F (175°C) to prepare for baking the apple crisp.
- Prepare Apples: In a large bowl, toss the peeled, cored, and sliced apples with lemon juice, sugar, and cinnamon until evenly coated.
- Assemble Filling: Spread the apple mixture evenly in a greased baking dish to form the base layer.
- Make Topping: In a separate bowl, combine rolled oats, all-purpose flour, brown sugar, and softened unsalted butter. Mix with your fingers or a pastry cutter until the mixture becomes crumbly.
- Add Topping: Sprinkle the crumbly oat mixture evenly over the apples in the baking dish.
- Bake: Place the dish in the preheated oven and bake for 35 minutes, or until the apples are tender and the topping is golden brown.
- Serve: Remove from the oven and let cool slightly. Serve warm, optionally topped with a scoop of ice cream for extra indulgence.
Notes
- Use tart apples like Granny Smith for a balanced sweetness and tartness.
- If you prefer a crispier topping, add a handful of chopped nuts to the oat mixture.
- To make it vegan, substitute butter with a plant-based margarine.
- For extra flavor, sprinkle a pinch of nutmeg or ginger into the apple mixture.
- Leftovers can be refrigerated for up to 3 days and reheated before serving.
- Prep Time: 20 minutes
- Cook Time: 35 minutes
- Category: Dessert
- Method: Baking
- Cuisine: American


Leave a Reply