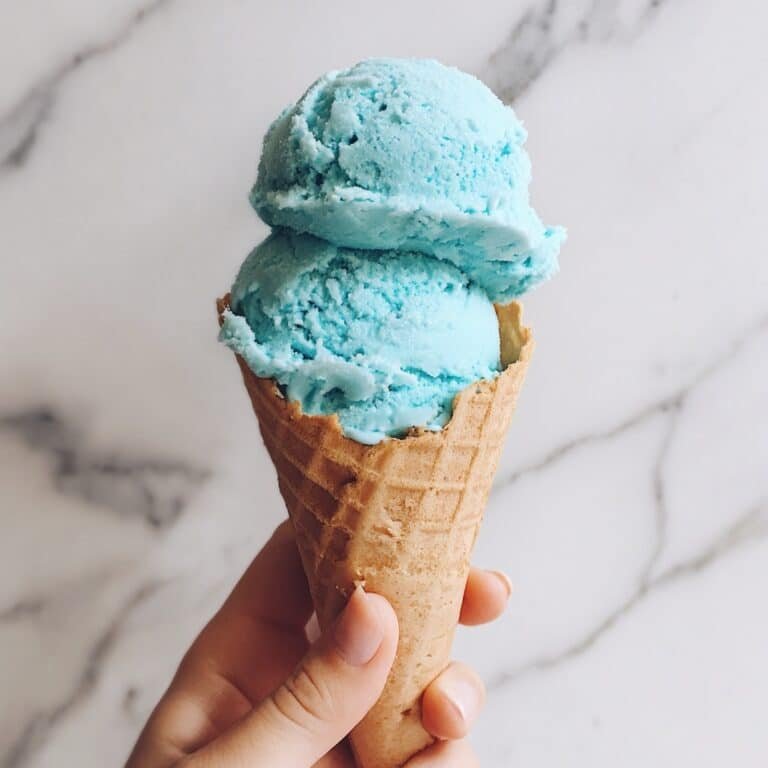
The Blue Moon Ice Cream Recipe is a delightfully nostalgic treat known for its mysterious fruity flavor and vibrant blue color. It’s perfect for those warm afternoons when you want something fun and refreshing, or to surprise guests with a unique homemade dessert. You’ll love how this recipe transforms simple ingredients into a silky, dreamy scoop that feels like summer in a bowl.

Jump to:
In the Kitchen
This Blue Moon Ice Cream Recipe captures the whimsical charm of the classic Midwest carnival favorite, bringing its signature fruity and slightly citrusy notes into your very own kitchen. Once you try it homemade, you’ll never want to buy store-bought again!
- Juicy and Tender Every Time: The combination of vanilla pudding and fresh extracts creates creamy smoothness with just the right fruity zing.
- Golden, Satisfying Finish: A hint of lemon enhances the bright flavor, while the creamy texture feels luscious on your tongue.
- Simple Ingredients, Big Impact: You’ll only need a few pantry staples to whip this up, making it an easy, crowd-pleasing homemade dessert.
- Weeknight to Weekend Ready: Whether you’re treating yourself on a random Tuesday or hosting a summer gathering, this ice cream fits the bill.
Ingredients at a Glance

For this Blue Moon Ice Cream Recipe, it's best to choose high-quality dairy and fresh flavor extracts to really let those vibrant notes pop. A few thoughtful ingredient choices make all the difference.
- Milk: Whole milk gives the creamiest texture—avoid low-fat varieties for best results.
- Heavy Cream: Adds richness and a smooth mouthfeel you'll adore.
- Instant Vanilla Pudding Mix: Acts as a natural thickener, making the ice cream silky without extra eggs.
- Raspberry Extract: Provides the primary fruity flavor—choose a pure extract for vibrant taste.
- Lemon Extract: Gives a subtle citrus twist that balances the sweetness beautifully.
- Blue Food Coloring: For that iconic, eye-catching shade—you can use gel or liquid, just be precise with the drops.
Heads-Up: Exact measurements are in the printable recipe card at the bottom.
How to Make Blue Moon Ice Cream Recipe
Step 1 — Mix Your Base with Care
Start by whisking together the milk, heavy cream, and instant vanilla pudding mix in your pint container. The pudding mix is key here — it thickens the base and adds just enough vanilla sweetness. Then stir in the raspberry and lemon extracts along with the blue food coloring, blending until the mix is smooth and vibrantly blue. You’ll notice the color brightens as you whisk! Cover the pint tightly and freeze it for 24 hours, so that it’s perfectly solid for the next step.
Step 2 — Creamify with Your Ninja Creami
Once your ice cream base is fully frozen, pop it into your Ninja Creami ice cream maker and select the “Ice Cream” setting. The machine works its magic, turning your frozen base into creamy, scoopable ice cream. When it’s done, take a peek at the texture—if it feels chalky or a bit crumbly (which can happen sometimes), don’t worry. Just make a small hole in the center of the ice cream and add a tablespoon of milk or water, then use the “re-spin” function. This trick helps the machine re-crystallize the texture, making it silky smooth again. Repeat if needed—you’ll soon get the luscious consistency you’re after.
Things to Remember
Having made this Blue Moon Ice Cream Recipe several times, I’ve learned that patience and a gentle touch really pay off. Here’s what you want to keep in mind to nail it every time.
- Doneness Cue: The mixture should be fully frozen solid before processing for the smoothest results.
- Temperature Trick: If the ice cream feels too firm after spinning, let it sit at room temperature for a few minutes to soften up before serving.
- Make-Ahead Move: You can prepare the base a day ahead and freeze it overnight—this makes your day-of preparation super easy.
- Common Pitfall: Adding too much coloring won’t improve flavor—stick to the suggested drops to keep both taste and appearance balanced.
Ways to Serve It

Finishing Touches
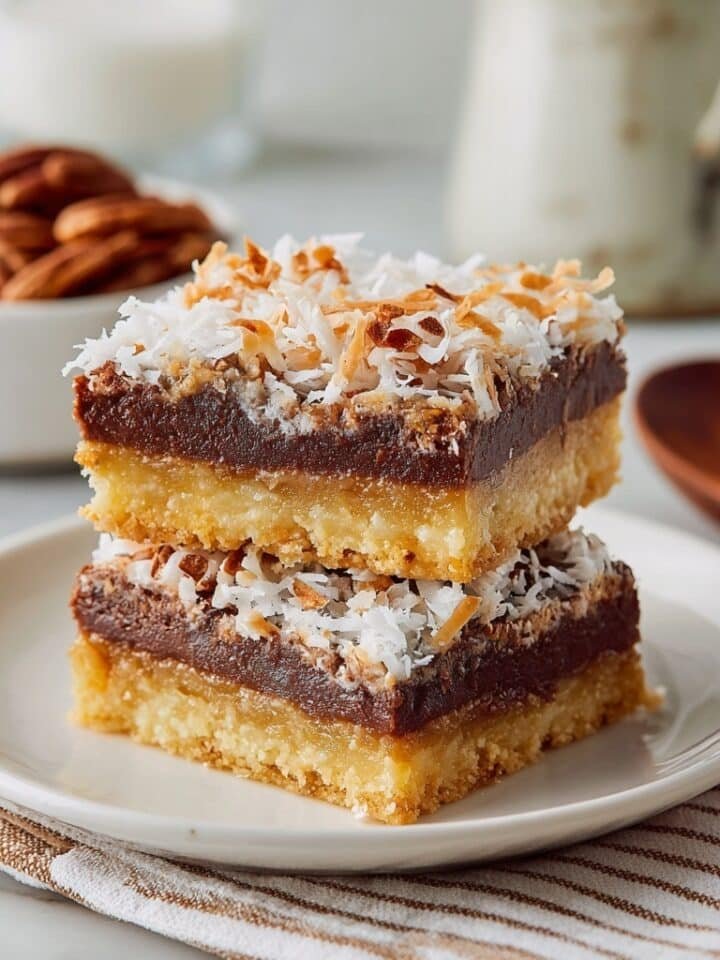
I love topping Blue Moon ice cream with toasted coconut flakes or rainbow sprinkles—the crunch contrasts wonderfully with the creamy texture. A drizzle of fresh berry syrup can amplify the fruity notes without overpowering that subtle citrus hint. Fresh mint leaves also add a refreshing aroma and pop of green that looks inviting on the vibrant blue base.
Plays Well With
Blue Moon’s unique flavor pairs beautifully with simple, complementary desserts like sugar cookies or lemon bars. I also like serving it alongside a waffle cone or garnished with candied citrus peel to enhance the lemony impression. If you’re feeling fancy, a small side of mixed berries brings a fresh burst and balances its sweetness nicely.
Simple Plating Upgrades
For easy styling, scoop your Blue Moon ice cream into chilled bowls to keep it from melting too quickly. Adding a sprig of mint or edible flowers instantly elevates its look at casual get-togethers. Using fun, colorful bowls or cones plays up the joyful vibe of this ice cream, making it even more of a conversation starter.
Make-Ahead & Keeping Fresh
Storing Leftovers
Keep leftover Blue Moon Ice Cream in an airtight, freezer-safe container to preserve its creamy texture and vibrant color. I like using containers with a tight-fitting lid to prevent freezer burn. Stored properly, it stays fresh and delicious for up to 1 week—after that, the texture can get a bit icy.
Freezing Tips
This ice cream freezes really well thanks to the pudding mix’s stabilizing effect. When you want to enjoy leftovers, allow the container to sit at room temperature for about 10 minutes before scooping to let it soften just enough. Avoid thawing and refreezing multiple times, as that impacts the texture noticeably.
Reheating Blue Moon Ice Cream Recipe Without Drying Out
Since this is an ice cream, reheating generally means letting it soften a bit before serving—not actually heating it up. If your ice cream is rock hard, I find microwaving at 10-15 second bursts on low power helps soften it gently without melting it completely. No oven or air-fryer necessary here—just patient, gentle softening preserves that creamy mouthfeel.
Frequently Asked Questions
Blue Moon tastes like a sweet and fruity combination with hints of raspberry and citrus, often described as a nostalgic carnival flavor. This homemade recipe recreates that signature taste with natural extracts.
While this recipe is tailored for the Ninja Creami’s “Ice Cream” setting, you can try making it using a traditional ice cream maker or by stirring the frozen base every 30 minutes during freezing to create a similar texture.
Yes, using food coloring in small amounts is safe. For a more natural option, you can experiment with natural blue dyes like butterfly pea flower tea, but the traditional bright blue is best achieved with food coloring.
If your ice cream feels chalky, adding a tablespoon of milk or water into the center and using the “re-spin” function on your Ninja Creami helps restore smoothness by breaking up ice crystals.
Final Thoughts
This Blue Moon Ice Cream Recipe is a fun and easy way to bring an iconic, playful flavor into your home kitchen. I’ve found that a little patience with freezing and re-spinning pays off big, resulting in a creamy, bright-skied scoop that’s just as joyful as a day at the fair. Whether you’re new to homemade ice cream or looking to impress with something nostalgic, this recipe is a sure winner you’ll come back to again and again.
PrintFull Printable Recipe
Blue Moon Ice Cream Recipe
Blue Moon Ice Cream is a creamy, nostalgic treat characterized by its unique blue hue and a delicate blend of raspberry and lemon flavors. Made with milk, heavy cream, and instant vanilla pudding mix, this ice cream is easy to prepare at home using a Ninja Creami machine, resulting in a smooth, vibrant dessert perfect for any occasion.
- Total Time: 24 hours 10 minutes
- Yield: 1 pint
Ingredients
Ice Cream Base
- 1½ cups milk
- ⅓ cup heavy cream
- 2 tablespoons instant vanilla pudding mix
- 1 teaspoon raspberry extract
- ½ teaspoon lemon extract
- 15 drops blue food coloring
Instructions
- Combine Ingredients: In your pint container, whisk together milk, heavy cream, instant vanilla pudding mix, raspberry extract, lemon extract, and blue food coloring until well combined.
- Freeze Mixture: Cover the pint container tightly and freeze it for 24 hours to allow the mixture to solidify and become ready for processing.
- Process Ice Cream: Use your Ninja Creami machine on the “Ice Cream” setting to churn the frozen mixture into smooth ice cream.
- Adjust Texture: Examine the ice cream’s texture. If it seems chalky or not creamy enough, create a small hole in the center and add 1 tablespoon of water or milk. Then, use the “re-spin” function to improve the creaminess.
- Repeat if Needed: Repeat the re-spin step until the texture reaches your desired creaminess.
Notes
- Adding a tablespoon of milk or water during the re-spin helps soften the texture if it feels too firm.
- Ensure the pint container is completely sealed before freezing to avoid freezer burn or ice crystals forming.
- You can adjust the amount of blue food coloring to achieve your preferred shade of blue.
- Substitute raspberry extract with other fruit extracts for customized flavors.
- This recipe requires a Ninja Creami or similar ice cream maker for best results.
- Prep Time: 10 minutes
- Cook Time: 24 hours freezing
- Category: Dessert
- Method: No-Cook
- Cuisine: American
- Diet: Vegetarian


Leave a Reply